The page below documents my spinnaker upgrade for a Nacra 5.5SL.
Spinnakers are becoming more common on beach cats. Several people have added them to the Nacra 5.5SL. The spinnaker on my boat is an older design. Many advances have been made since on spinnaker setup. So there are things that will be of use here to you if you want to try this on your boat. But there are better ways of doing some things. I will try to point those out where appropriate.
I have a standard bag launched spinnaker. I would recommend a snuffer system of some type for ease of use. Never the less, the bag system works, and I have even learned to use it why sailing solo.
I would recommend you also see the Nacra 5.5 I-20 spinnaker setup originally posted at 1Design.net
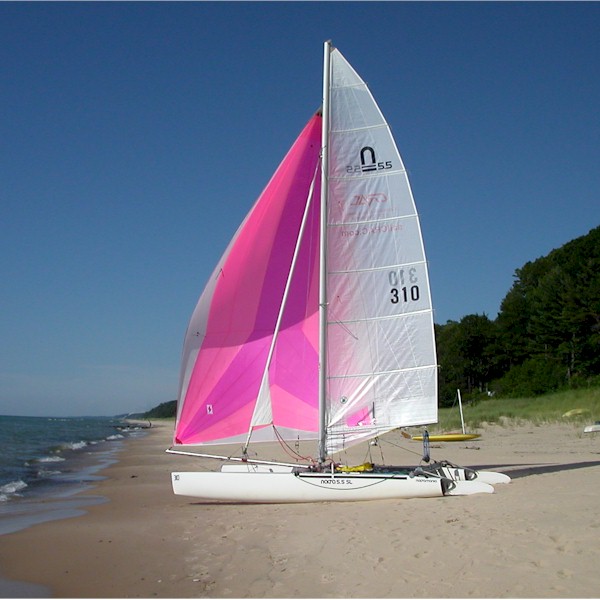
My boat with spinnaker up.
I have set up the boat to use one line to raise the halyard and pull the tack to end of pole.
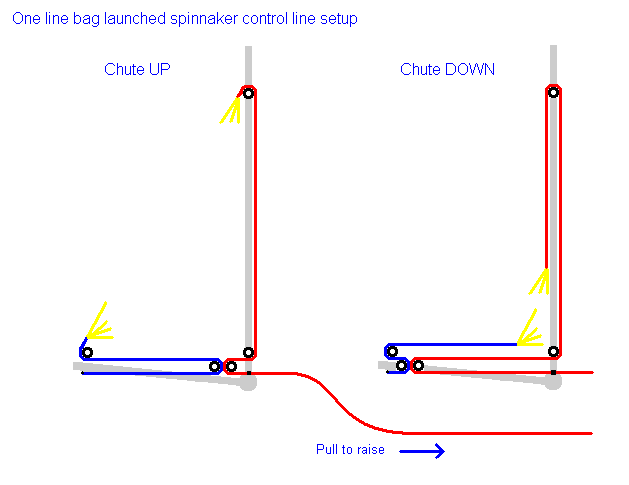
Standard bag launched spinnakers normally would use 2 lines to pull up the spinnaker. One to pull the chute up (a halyard), and one to pull the front of the chute out to the end of the spinnaker poll. Below is a description on how to use one line to raise the chute and pull the tack to end of pole. This simplifies launching.
Below is a diagram of how it works.
In the diagram, the boats mast and spinnaker pole are shown in gray. The red line is the halyard to pull up the sail. In this case, it also pulls on a block attached to the blue line to pull the front of the spinnaker out to the end of the poll.
Please study the diagram to understand, but I will try to explain it.
When the chute is down (right drawing), and the red line is pulled to raise the chute, the back-to-back block connecting the blue tack line and red halyard line is pulled back. This pulls the chute tack out forward. This tends to happen prior to the halyard going up because of there is less friction/gravity on it than the halyard. When it is pulled tight, the halyard portion of the line starts coming, pulling up the chute.
To lower, just release the one line and pull the chute down. I like to grab the chute clew (back bottom), release the clew line, release the halyard line, then pull in the tack (front) of the chute all the way in. This collapses the chute. When the tack is in, I pull the chute down and stuff it in the bag. I don't get into much technique on this page, but raising and lowering is easiest going dead down wind since the main sail blocks the wind. I said easiest, dead downwind may not be best technique when racing.
As far as setup, the one block is shown attached to the lower end of the mast. It can be put here, but this is actually usually on the front beam. It was just easier to make the diagram this way. Also the fixed attachment point for the blue line is on top of the poll, not below. The small black square on the front beam is a cleat.
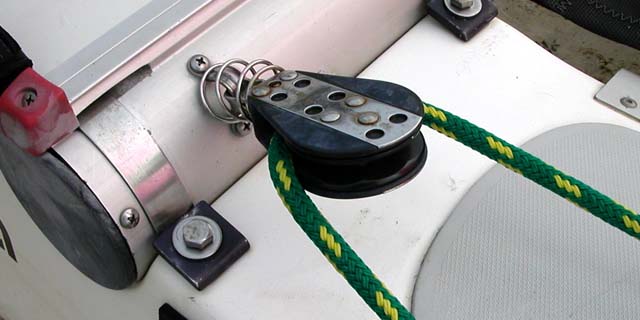
Below are photos of my setup. The white with red line is part of the one line halyard/tack setup and gets tied to the tack (front bottom) of the spinnaker. It is the blue line in the diagram further above. It is shown in the spinnaker up position. It attaches via back-to-back block with the yellow line which corresponds to the red line in the diagram further above.
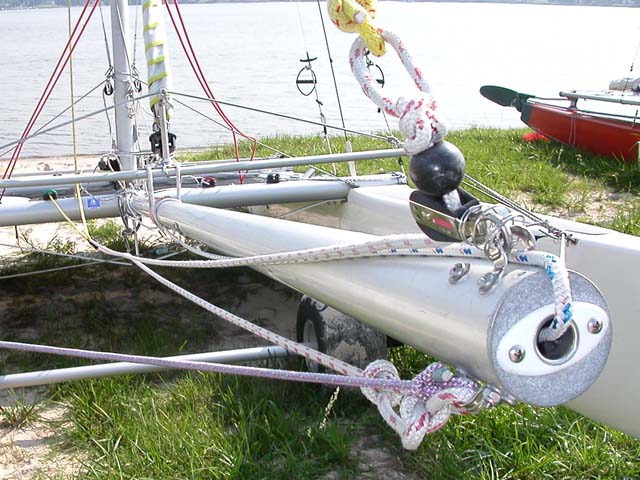
Below is a view from the other end. Note I cheated and just tied off the halyard block to a mast over rotator cleat, rather than attaching it to the beam.
Advantages to this system is ease of use to raise the spinnaker. Only one line is needed. The could make raising the spinnaker faster.
Disadvantages are a much longer (red) halyard is needed and so more must be pulled and stored when raising the sail. There is also less flexibility in which portion of the sail goes up or comes down first. But overall, I have used and like this setup.
I have a roughly 300 sq ft (27.5 sq mtr) spinnaker. This is too big for this boat, except for in light winds. Between that and a fairly short 11.5 ft spinnaker poll, I need my clew blocks on the back beam. Most newer boats will have a higher aspect (taller and skinnier) spinnaker and have this block mounted on or near the shroud line.
I used Harken Ratchamatics. They catch in one direction when under load, and release to spin easier when the spinnaker is not pulling hard (IE, when jibing). Highly recommended.
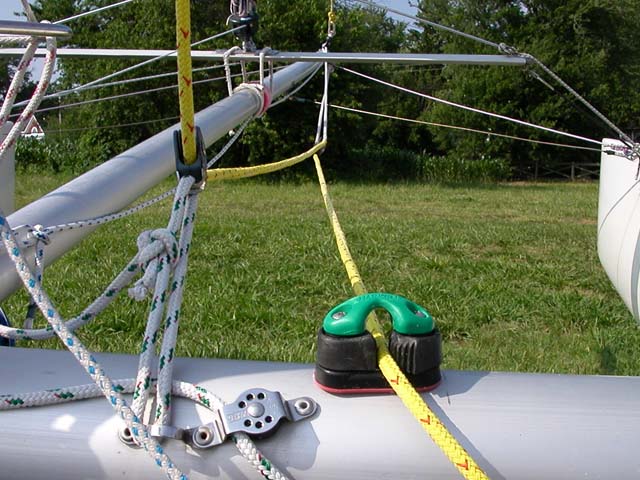
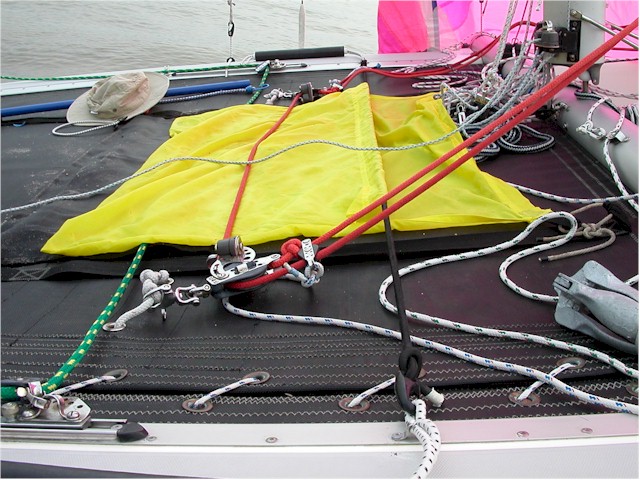
This line runs up to a smaller set of blocks which I have hooked to the jib adjuster "travelers". It give a better pulling angle. (They are somewhat visible in a spinnaker bag photo further below if you want to see it)
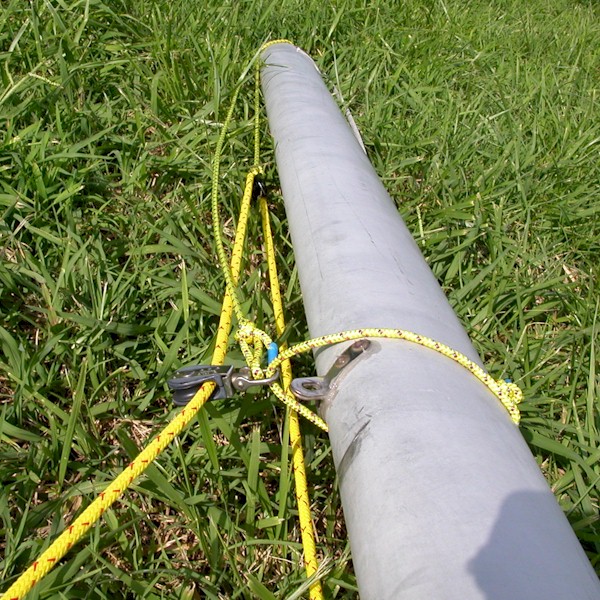
The easiest way to attach the spinnaker top halyard block is to add a simple tang to the mast. My boat originally was set up this way but I have modified it based on recent setups I have seen on the net.
Using just a simple tang to the mast made my mast bend rather "funny" when the spi flew. Its hard to describe here, but the setup below is recommended and keeps a "better" mast shape. A loop is attached to allow the spinnaker attachment point to move around to the side of the mast.
Overview photo:
Note that the old halyard tang is still on the mast. It is no longer needed but I have not yet removed it.
The reason for this complex setup is to allow the mast to rotate better, and allow the spinnaker halyard to rotate around the the side of the mast.
Wishing to avoid any drilling to the interior of the mast, the loop attached by drilling holes into the mast into the main sail track. 4 holes are drilled, 2 on each side, one above the other. The line is fed in one hole on each side, then fed out the other hole on that side and tied off outside. This allows the lines to sit in the corner of the mast grove and to be tied off without interfering with sail or main halyard that are in the groove. See diagram.
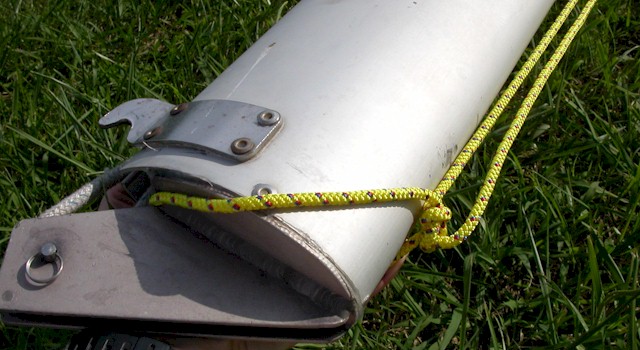
Still wishing to avoid any drilling to the interior of the mast, I simply wrapped the line around the top of the mast as shown and tied it off.
How far up your mast should your chute be attached?
Good question. I'll try to remember to measure mine.
(future update - get chute top measurement)
The site at 1Design.net Florida Nacra 5.5 Homepage recommends 3 ft from the top of the mast. There is not class limit, just a structural limit. Search the net for more info.
There are many fine commercial launch bags available. To save money, I sewed a very simple bag based on a design I saw on a tornado. I used some cheap yellow nylon material to make a prototype bag. I don't like the yellow, but it works fine so I have not yet made another bag.
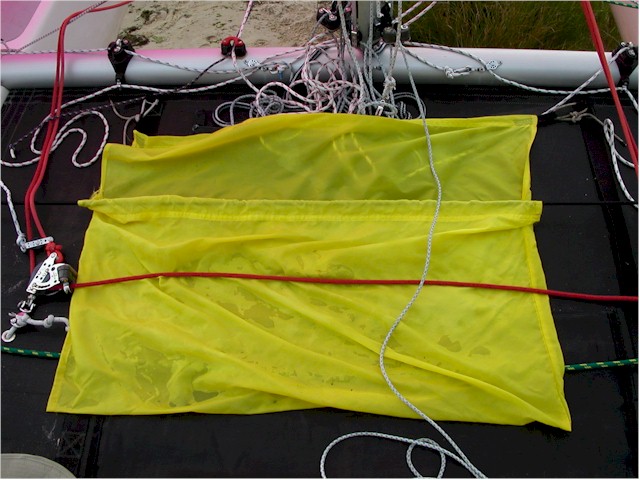
A simple bungee cord runs through the front top of the bag and across the tramp to hold the spinnaker in the bag. The lower top corners tie off to the forward most loop in the hiking strap.
My poll is not worth posting. It is big (2 1/2 inches diameter) and heavy. It came with the boat, which I bought used. Although I have updated it some, this is an example of what not to do. So look elsewhere for ideas.
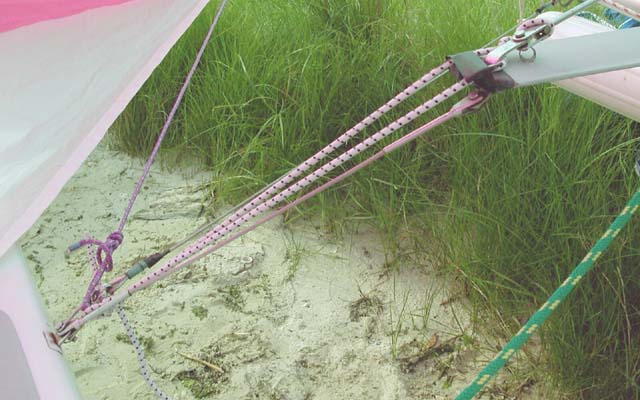
Some comments: Many people have drilled holes in the just back from the bow to attach lines leading to the end of the poll. Since my poll is fairly short (~11.5 ft) and stiff, I ran the line (purple below) to the bridal attachment points instead. This seems to work fine for me. There is also a wire attached to the poll about mid-way.
Ignore the line coming out of the end of the poll. It is not used anymore. The original owner had the line going through the poll and out the end, but that did not work well at all. Those polls that I have seen with a line going thought he poll have an internal block with the line exiting a cut out on the top of the poll, vice the end.
The poll is simply tied to the bridal foil with some line.
The bridal foil on Nacras can present problems when dealing with spinnakers. One, the clew line likes to catch under the bridal foil ends when jibing. I added shock cord as in the photo below to prevent this. The clew line just slides up the shock cord, rather than sliding up the short bridal wire and catching under the edge of the foil.
Also, the clew line likes to catch between the bridal foil "upright" and the bottom jib connection. I added another shock cord from the top of the bridal foil unit, to the mast, so the line would not fall in this gap. This line needs to be somewhat loose so as not to interfere with the jib sail shape.

Another thing that catches is the knots tying the clew line to the clew. I ended up putting the middle continuous part of the line on the clew and then tie off the ends on the other side between the blocks on the tramp. I seem to have enough line and space between blocks that this works fine for me.
Spinnakers can be fun. They can also add a lot of complexity and are often more trouble then they are worth. But if you are ready to go to the next level, you should have a good time.
As I said up top, there are a multitude of ways to put on a spinnaker, there is no standard method. Check out the Nacra 5.5 I-20 spinnaker setup originally posted at 1Design.net for great ideas. Use some of my info here and from other places, and it can be done with a little research and thought.
I have a roughly 300 sq ft (27.5 st mtr) spinnaker. This is too big for this boat. But it was part of boat when I bought is used, and I wanted a spinnaker, to play with and learn from. I'm still learning. And actually it is fine in the light winds typical where I live. I only run it up to about 12 mph or a little higher if I have good crew.
At first I had problems in higher wind of having too much sail forward, which wants to push the boat to far down wind, causing me to have to *push* on the tiller to keep it on course. That is not good. But I found that if remember to pull the boards up (which is optimal for down wind anyway) that the tiller steering is fine. If you have tiller push, other options are to adjust the rudder rake forward (using adjustment screws in rudder casings) and/or the mast rake back to adjust for this.
The Florida fleet on the 1Design.net at one time standardized on a 230 sq. ft. spinnaker designed specifically for the Nacra 5.5 available from Ullman Sails. That is probably a more reasonable size for this boat.